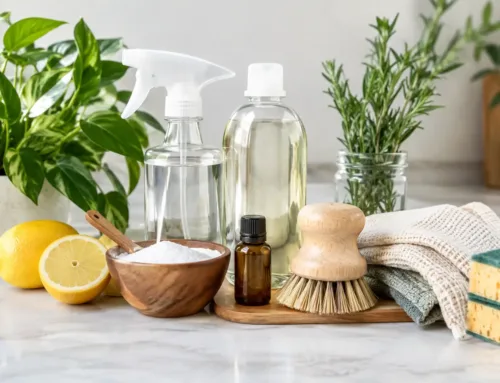
That tacky feeling around cabinet handles is not a sign that your kitchen is dirty beyond saving. It is usually a thin, stubborn mix of cooking oil, steam, dust, and fingerprints. The right natural cleaner for greasy cabinets can lift that film without filling your kitchen with harsh solvent fumes or leaving a residue of its own.
Grease is sneaky. It settles most heavily on the cabinet doors beside the stove, beneath the range hood, and around the pulls you touch every day. Left in place, it catches more dust, dulls finishes, and becomes much harder to remove. The good news is that gentle cleaning works remarkably well when you use the right amount of moisture, a little surfactant, and some patience.
A natural cleaner for greasy cabinets starts with the right mix
For most sealed, painted, laminate, and vinyl-wrapped cabinets, start simple: warm water and a small amount of mild liquid dish soap. Choose a biodegradable, fragrance-light soap when possible. Soap contains surfactants, which surround oil so it can be lifted from the cabinet and carried away in rinse water.
Mix about one teaspoon of dish soap into two cups of warm water. Warm, not hot, water is the sweet spot. It helps soften kitchen grease without creating steam that can work its way into joints, edges, or unfinished areas of cabinetry.
Dip a soft microfibre cloth into the solution and wring it out thoroughly. The cloth should feel damp, never dripping. Work in small sections, wiping in the direction of the wood grain if your cabinets have one. Follow immediately with a second cloth dampened with plain water, then dry the area with a clean towel.
That rinse-and-dry step matters. Soap is excellent at releasing grease, but too much soap left behind can feel sticky and attract fresh grime. A cabinet surface should feel clean and smooth when you run your hand over it, not slick or squeaky.
Give heavy grease a little time
Old grease does not always disappear with one fast wipe. Instead of scrubbing harder, hold the damp, soapy cloth against the greasy patch for 20 to 30 seconds. This gives the solution time to loosen the film. Wipe gently, rinse your cloth, and repeat if needed.
This approach is kinder to cabinet finishes than aggressive scouring. It is especially useful near stove-side doors, on the bottom edge of upper cabinets, and around handles where skin oils add another layer of grime.
When vinegar helps, and when it does not
White vinegar is popular in natural cleaning recipes because its mild acidity can help cut through mineral residue and some kitchen buildup. For greasy cabinets, however, it is not automatically the best first choice. Grease responds most directly to a surfactant such as dish soap, while vinegar is better suited to certain water marks and hard-water deposits.
If your cabinets are laminate or a durable painted finish, you can use a very diluted vinegar solution after a soap wash for lingering dullness: one part white vinegar to three parts water. Apply it to a cloth rather than spraying it directly onto the doors, then wipe dry.
Skip vinegar on unsealed wood, waxed finishes, damaged paint, or cabinets with visible cracks and worn edges. Acidic cleaners can dull or weaken vulnerable finishes over time. If you do not know what your cabinets are made of or how they were finished, the warm-water-and-mild-soap method is the safer choice.
Natural does not always mean suitable for every surface. A cleaner can be plant-derived and still be too acidic, too abrasive, or too oily for your cabinetry.
Avoid the kitchen fixes that create a bigger mess
Baking soda has its place, but it is mildly abrasive. It can help with a small, truly stubborn spot on durable laminate, yet it is not a daily cabinet cleaner. A paste rubbed repeatedly over painted, glossy, or softer wood finishes can leave a dull patch that looks worse than the grease.
Oil-based DIY blends are another common trap. Lemon oil and other oils may make wood look shiny for a moment, but they can leave behind a film that holds dust and grease. The same goes for using too much dish soap. More product does not mean more cleaning power.
Be cautious with strong citrus solvents, even those marketed as natural. They can be effective on stubborn sticky residue, but concentrated formulas may affect paint, clear coats, or cabinet edging. Test any new cleaner on a small hidden area first, such as the inside edge of a door.
Never soak cabinet seams, hinges, or the underside of doors. Moisture can swell engineered wood, loosen veneer, and leave a lasting mark. A damp cloth and a dry follow-up cloth give you far more control than spraying cleaner freely over the surface.
Match the method to your cabinet material
Material makes a difference. Sealed solid wood and wood veneer need the lightest touch: a barely damp cloth, mild soap, a plain-water wipe, and prompt drying. Do not let water sit near joints, carved details, or chipped areas.
Painted cabinets can usually tolerate the same method, though older paint or hand-painted finishes deserve a hidden-spot test. For matte paint, avoid abrasive pads because rubbing can create shiny spots. For glossy paint, use a very soft cloth to prevent fine scratches.
Laminate and thermofoil cabinets are generally forgiving, but their edges can be vulnerable. Clean the face of the door first, then lightly wipe around seams rather than pushing moisture into them. If the wrap is lifting, keep liquids away from that area and dry it immediately.
Metal handles and knobs often hold the most concentrated grease. Clean them with the same diluted soap solution, using a soft toothbrush only if necessary. Wipe away all residue and dry well. If hardware has an aged or specialty finish, test first rather than assuming it behaves like stainless steel.
A practical routine that keeps grease from building up
The easiest cabinet degreasing job is the one you never let become a weekend project. After frying, roasting, or cooking with lots of oil, wipe the cabinets nearest the stove with a damp microfibre cloth once the area has cooled. It takes less than a minute and removes fresh splatter before it cures into a sticky layer.
For a busy household, clean handles and the stove-side cabinet fronts weekly. Give all cabinet faces a gentle wash every month or two, depending on how often you cook. If you have an open kitchen, use a powerful range hood, or rarely fry food, you may need less frequent cleaning. There is no prize for over-cleaning a finish.
Ventilation also does real work. Use the range hood whenever you cook, especially when sautéing, searing, or frying. A clean hood filter helps capture airborne grease before it settles on cabinets, walls, and light fixtures.
If the grease still will not release
A cabinet surface that remains tacky after a careful soap wash may have more than kitchen grease on it. Old furniture polish, aerosol cooking spray, nicotine residue, or a previous cleaner can form a layered film. In that case, clean a small test patch several times with fresh, diluted soap solution and plain-water rinses before trying anything stronger.
If the sticky area is actually adhesive residue from a label, child lock, protective strip, or old hardware pad, treat it as a separate problem. Adhesives need a purpose-built remover, not repeated scrubbing. Choose a non-flammable, biodegradable formula designed for sticky residue, test it in an inconspicuous spot, and keep it away from unsealed wood and damaged finishes.
A clean cabinet should feel like part of the kitchen again, not another surface you avoid touching. With a damp cloth, mild soap, and a few careful habits around the stove, you can keep the finish looking cared for while keeping harsh fumes out of the room where everyone gathers.